Thu, 05 May 2005, 01:50:15 UTC-08:00
Homemade Bicycle Repair Stand
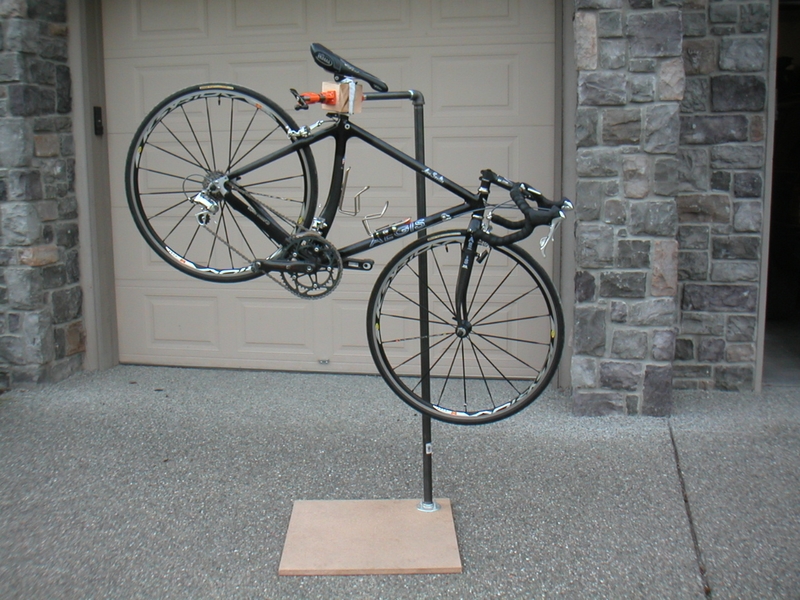
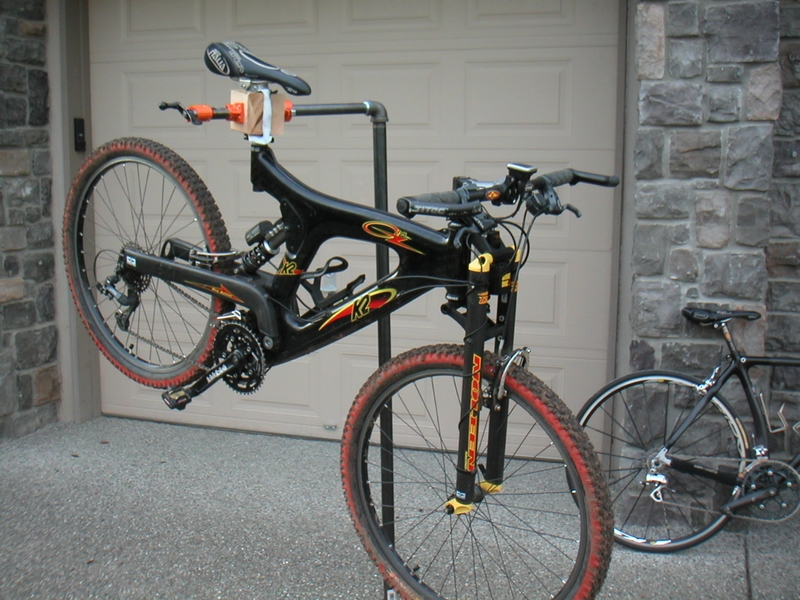
For a long time, I had wanted a repair stand in order to work on my bikes. These stands are meant to support the bike by one of their tubes in an elevated position so you can freely turn the wheels and easily access parts. However, many high quality stands are expensive. They range anywhere between $150 to $250. After reading a thread in BikeForums that was started by a guy who did the same thing, I also decided to build my own using parts from Home Depot. My goal was to keep it all under $50... preferably closer to $30. I knew I wasn't going to end up with something that has all the features of a quality Park Tool stand or anything but I at least hoped to build a solid and functional workstand.
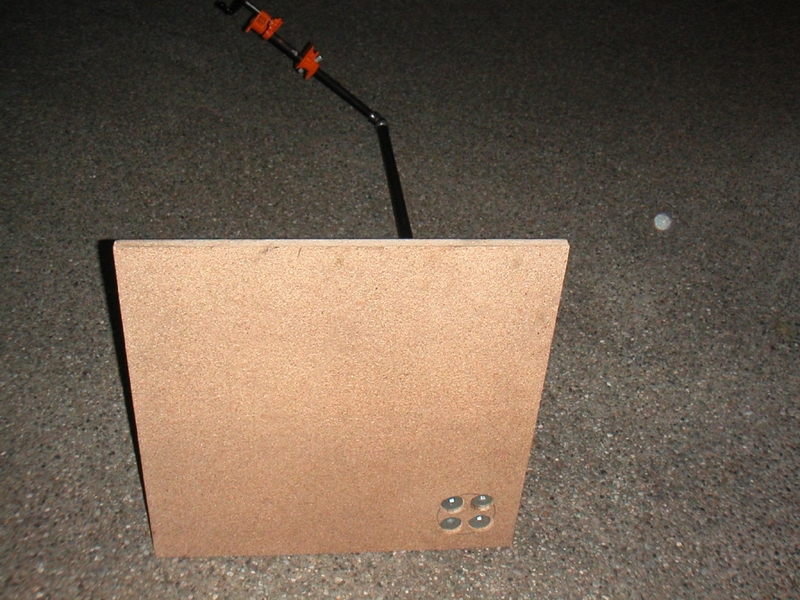
I used the same basic design as others in that thread: 18" long 3/4" diameter pipe for the Pony clamp to a 1"->3/4" reducer-elbow to a 1" diameter. I managed to pick up a 60" long 1" diameter pipe so it's all one segment as opposed to the other two folks who used shorter segments coupled together. However, I opted to go for a flange coupled to a particle board 2'x2' base instead of using a pipe base. I figured that a base extending out at least as far or further than the horizontal arm should be stable enough.
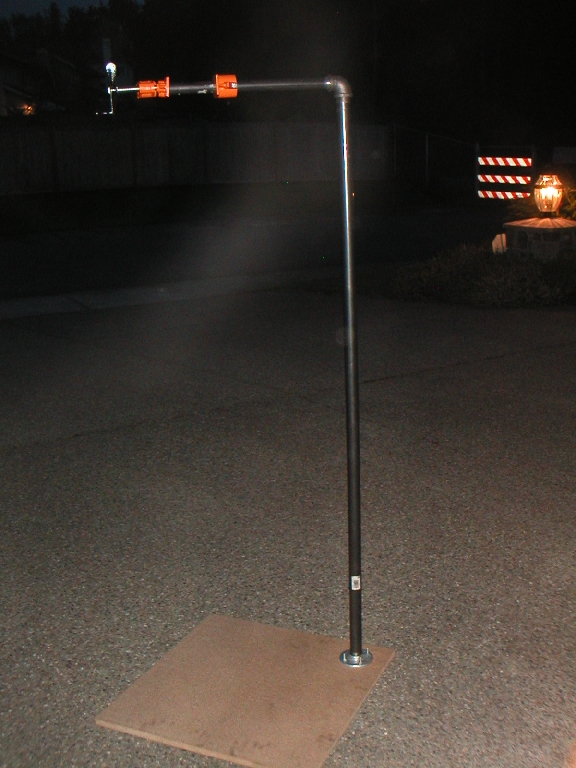
The vertical pipe is attached using four bolts to the base. Yes, I need to remove the ugly sticker.
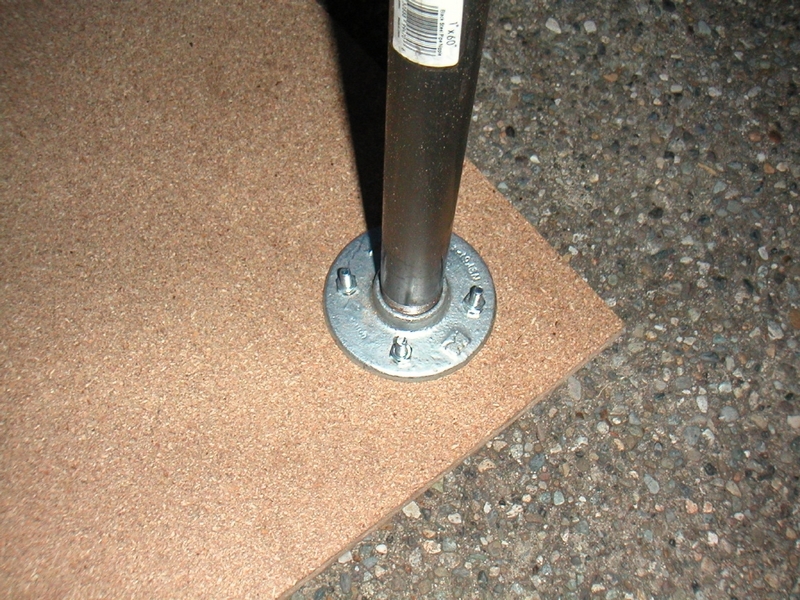
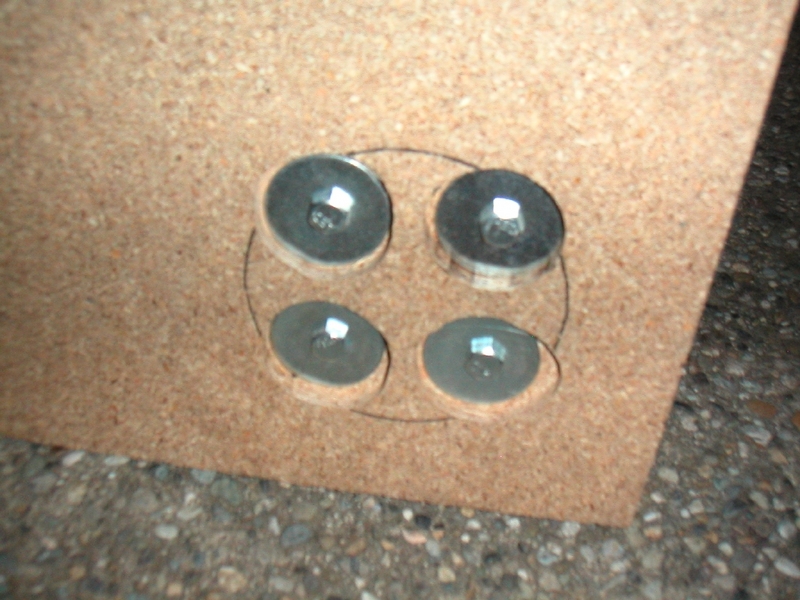
I decided to use some large washers to spread out the load on the bottom. In order to allow the base to sit flat, I had to countersink the bolt and washer. Unfortunately, I didn't have a spade bit large enough... strike that. I couldn't find any of my spade bits... grrrrrr. I need to clean my garage. So instead, I used my router which worked pretty well since it allowed me to compensate for some CEP (circular error probable) and provided me with a consistant countersink depth. As you can see, I traced the flange first, marked the holes, overlaid the washers onto the holes and then traced the washers to tell me where I needed to route.
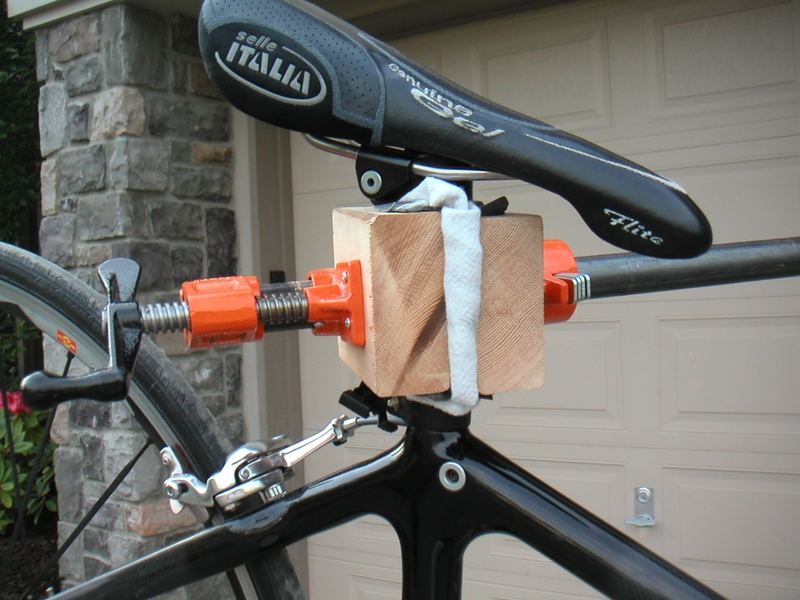
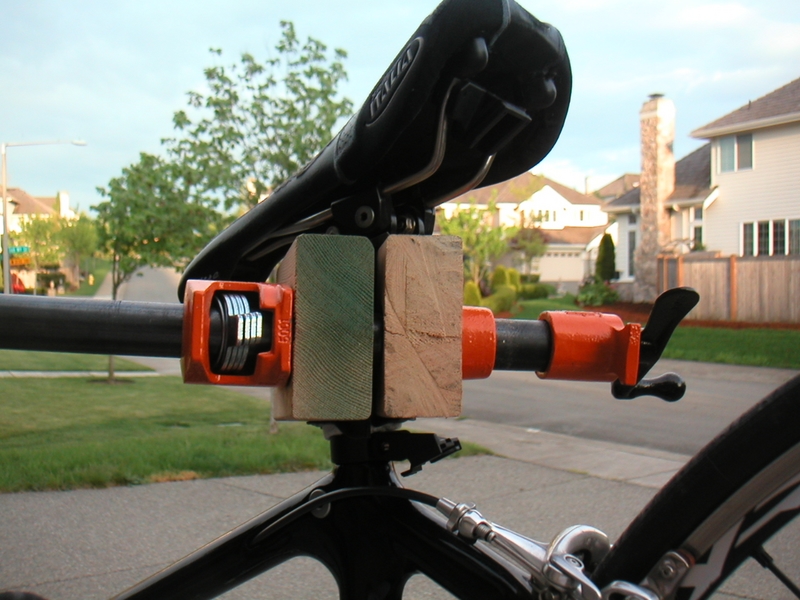
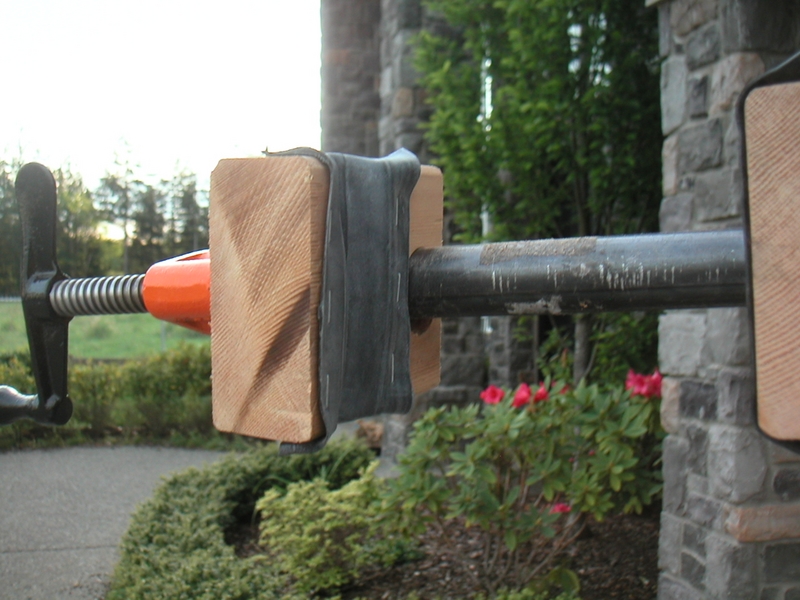
I then decided to create a drill-through clearance hole on the wood blocks to allow them to pass along the 3/4" pipe. I used a 1" bore for that. I then stuck the two 2"x4" sections together and bored through vertically to create the concave channels in each half of the wood block clamp pads. Then I stretched some old innertubes into the concave sections and stapled at the edges to act as rubber padding. Nevertheless, I still use a rag around the seatpost for extra measure.
All told the entire project took me about five hours of my time including gathering of materials and construction/assembly. Total cost of materials was just shy of $40. Home Depot isn't the cheapest place to get these parts but I did have a gift card that my in-laws gave me for Christmas and felt that was a good use of it. Some other people have claimed to have sourced the Pony clamp for about $3. Mine cost me $12. And pipes could have been found for about half the price. If I had hunted around, I probably could have built this for well under $20 in material. Additionally, cheap repair stands can be found via some online retailers for around $40 + S&H. However, I feel that sometimes there's a little added value in building something yourself. Besides, I know my stand is much more stout (if a bit heavy) than those cheap stands that are liable to last only a couple of years.
Posted by khuon on Thu, 05 May 2005, 01:50:15 UTC-08:00I read your link on bike forums
Just wanted to say thank you for showing us the way to build a bike stand.
I am 41 years old and want to start to work on my bikes but I dont like bending over the bike all the time.